In This Topic
GanttView lets you print the chart and perform basic as well as advanced print settings using built-in methods. To use the printing in the GanttView, follow the below steps:
- Add a reference to the C1.Win.Printing assembly to enable the print preview feature. This assembly contains C1.PrintDocument, C1.Win.PrintPreview and C1.Win.RibbonPreview libraries that can be used with GanttView control.
- Set the EnablePrinting property of C1GanttView to True. Once this property is enabled, the Print button, appears active on the GanttView toolbar.
GanttView assembly includes a PrintInfo class to control the information related to printing the schedule. The properties in the PrintInfo class are available at design-time, runtime, and programmatically.
To print your project schedule, follow the steps below:
- From the GanttView toolbar, click the Print button (
 ) to open the Print dialog box.
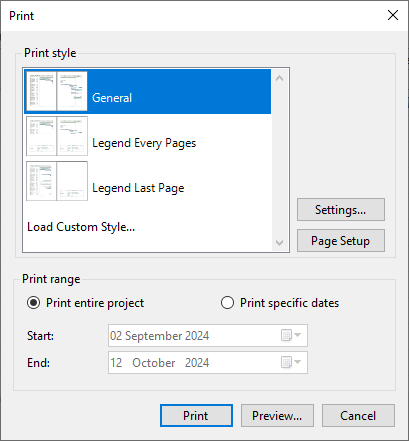
- Select the type of print styles from the Print style in the Print dialog box.
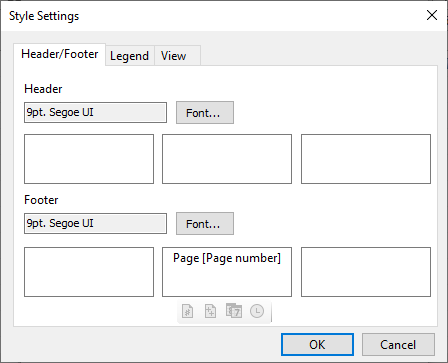
- Click the Settings... button to open Style Settings dialog box and customize the header, footer, and legend's appearance for each page.
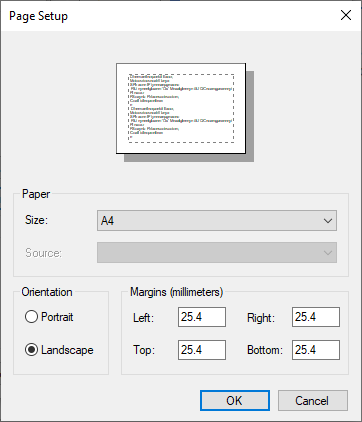
- In the Print dialog box, click the Page Setup button to specify the page size, source, orientation, and margins.
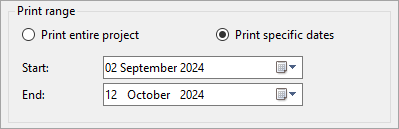
- In the Print dialog box, you can choose to print either the entire project or a specific range by clicking the radio buttons. To print a specific range, click the Print specific dates radio button and select start and end date in the two combo boxes. By default, Print entire project radio button is selected.
- Click the Print button in the Print dialog box to start printing using the system default printer. Once the print process starts, the Processing Document form appears indicating the status and the completion percentage of progress.
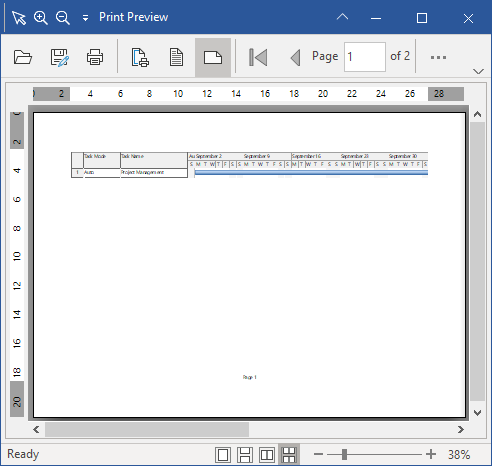
- Click the Preview... button in the Print dialog box to preview the document. The Print Preview dialog appears after the preview document is generated that allows you to make changes in page setup, orientation, zoom, export, or print.