- Input Overview
- Key Features
- Quick Start
- Input Controls
- Placeholder
- Button Types
- Text Alignment
- Dropdown Alignment
- Data Formatting
- Data Parsing
- Data Validation
- Input Masking
- Handling Errors
- Handling Null and Empty Values
- Culture Settings
- Keyboard Navigation
- Appearance and Styling
- Themes
- Command Binding
Quick Start
This quick start demonstrates how to implement Command Binding in a WinForms application using a C1Button.
Commands are implemented via the System.Windows.Input.ICommand interface and bound to buttons, eliminating the need for event handlers.
Note: For Command Binding, it is recommended to use the standard System.Windows.Input.ICommand interface, which is part of .NET (available in all .NET versions that support WPF or Xamarin, and can be implemented in any UI library)
This Section demonstrates how to create a WinForms Application using Command Binding in C1Button.
Set Up Application
Create a new Windows Forms app in Visual Studio.
Install C1.Win.Input using NuGet Package Manager. The C1Button control will be added to the Toolbox once the package gets installed.
Command Binding is available only From Version 8.0.20252.715 of C1.Win.Input .
Drag and drop the C1TextBox and C1Button from toolbox to Windows Form App.
Launch Application and Initialize Form
When the WinForms application starts, Form1 is created and initialized.
public Form1()
{
  InitializeComponent();
  // Create controller and pass the textbox reference
  _controller = new MainFormController(c1TextBox1);
  // Create C1Command to bridge WinForms and ICommand
  _showMessageCommand = new C1Command {Command = _controller.ShowMessageCommand};
  // Bind the controller's command to the C1Button
  c1Button1.Command = _showMessageCommand.Command;
}
Command Property of C1Button
The .Command property is the key feature that enables Command Binding in C1Button. It allows the button to be linked directly to an object that implements the ICommand interface, such as a RelayCommand or a C1Command.
Implement RelayCommand Class
Before binding commands to C1Button, create a reusable RelayCommand class that implements the ICommand interface. Use a single, generic RelayCommand class to handle all command definitions.
This class allows you to define what a command does (Execute) and when it can be executed (CanExecute), without writing separate event handlers for every UI element.
using System.Windows.Input;
namespace CommandBindingSample
{
     public class RelayCommand : ICommand
     {
       private readonly Action<object?> _execute;
       private readonly Predicate<object?>? _canExecute;
       public event EventHandler? CanExecuteChanged;

       public RelayCommand(Action<object?> execute, Predicate<object?>? canExecute = null)
       {
           _execute = execute ?? throw new ArgumentNullException(nameof(execute));
           _canExecute = canExecute;
       }

       public bool CanExecute(object? parameter) => _canExecute?.Invoke(parameter) ?? true;
       public void Execute(object? parameter) => _execute(parameter);
       public void RaiseCanExecuteChanged() => CanExecuteChanged?.Invoke(this, EventArgs.Empty);
     }
}
Initialize Controller and Setup Command
The MainFormController receives the C1TextBox reference and initializes the RelayCommand. Keep business logic outside the form in a controller class (e.g., MainFormController).
public MainFormController(C1TextBox textBox)
{
  this.c1TextBox1 = c1TextBox1;
  ShowMessageCommand = new RelayCommand(ExecuteShowMessage, CanExecuteShowMessage);
  c1TextBox1.TextChanged += (s, e) =>
    {
      (ShowMessageCommand as RelayCommand)?.RaiseCanExecuteChanged();
    }
}
Expected Outcome
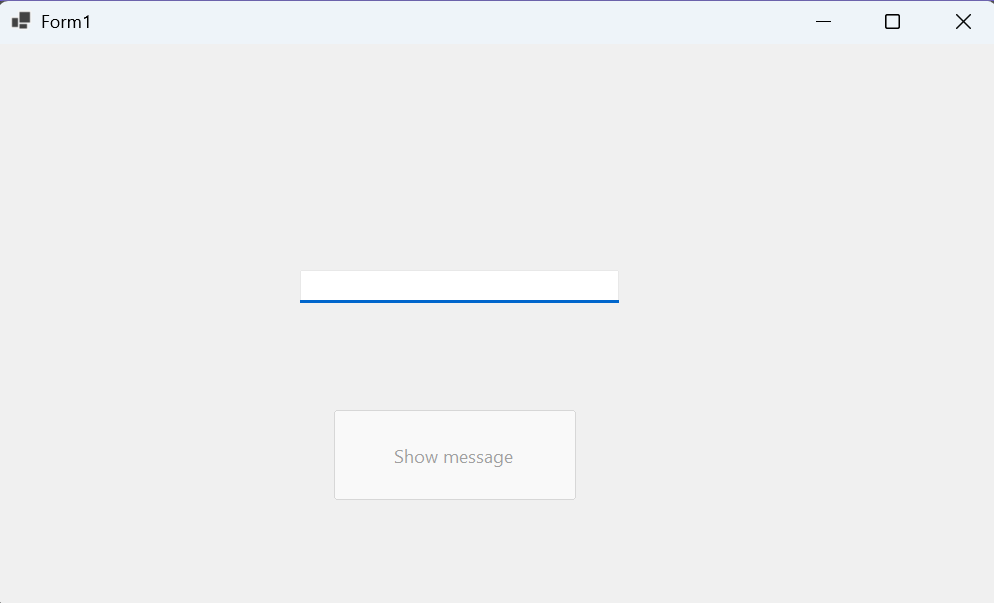
When the form runs, the following state applies initially:
The C1TextBox is empty.
The C1Button checks CanExecuteShowMessage() -> returns false.
Therefore, the button appears disabled.
private bool CanExecuteShowMessage(object parameter)
{
    return !string.IsNullOrWhiteSpace(c1TextBox1.Text);
}
Command Execution Through UI Interaction
When clicked, the button automatically calls the command’s Execute() method:
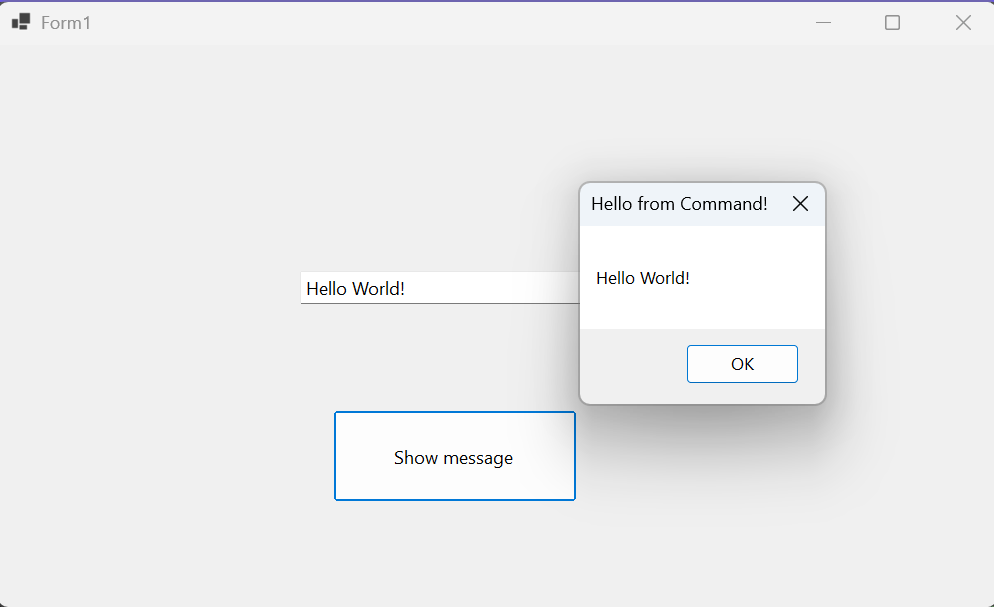
private void ExecuteShowMessage(object parameter)
{
    MessageBox.Show(
        c1TextBox1.Text.ToString(),
        "Hello from Command!",
        MessageBoxButtons.OK
    );
}
Result → A message box pops up showing the text entered in the textbox.
Command Execution Through Keyboard Shortcut
Form1 overrides ProcessCmdKey to support shortcuts:
protected override bool ProcessCmdKey(ref Message msg, Keys keyData)
{
    if (keyData == (Keys.Control | Keys.M))
    {
            _showMessageCommand.Invoke(null); // Checks CanExecute & executes with the Invoke() method
            return true;
    }
    return base.ProcessCmdKey(ref msg, keyData);
}
This method performs the same logic as the button click. The command executes and shows the message box.