
- SpreadJS Overview
- Getting Started
- JavaScript Frameworks
- Best Practices
- Features
- SpreadJS Designer
- Tutorials
- SpreadJS Designer Component
-
SpreadJS Collaboration Server
-
Collaboration Framework
- js-collaboration
- js-collaboration-ot
- js-collaboration-presence
- SpreadJS Sheets Collaboration
- Glossary
-
Collaboration Framework
- Touch Support
- Formula Reference
- Import and Export Reference
- Frequently Used Events
- API Documentation
- Release Notes
Tutorial: Real-Time Collaborative Text Editor
This tutorial guides you through using js-collaboration and js-collaboration-ot to build a real-time collaborative text editor based on Operational Transformation (OT). Users can edit rich text content in real-time within the same room, with all changes synchronized to other clients.
This example uses Quill as the rich text editor component, but you can replace it with other editor components.
Prerequisites
Installation of Node.js v16+ and npm
Foundational knowledge of JavaScript and terminal operations
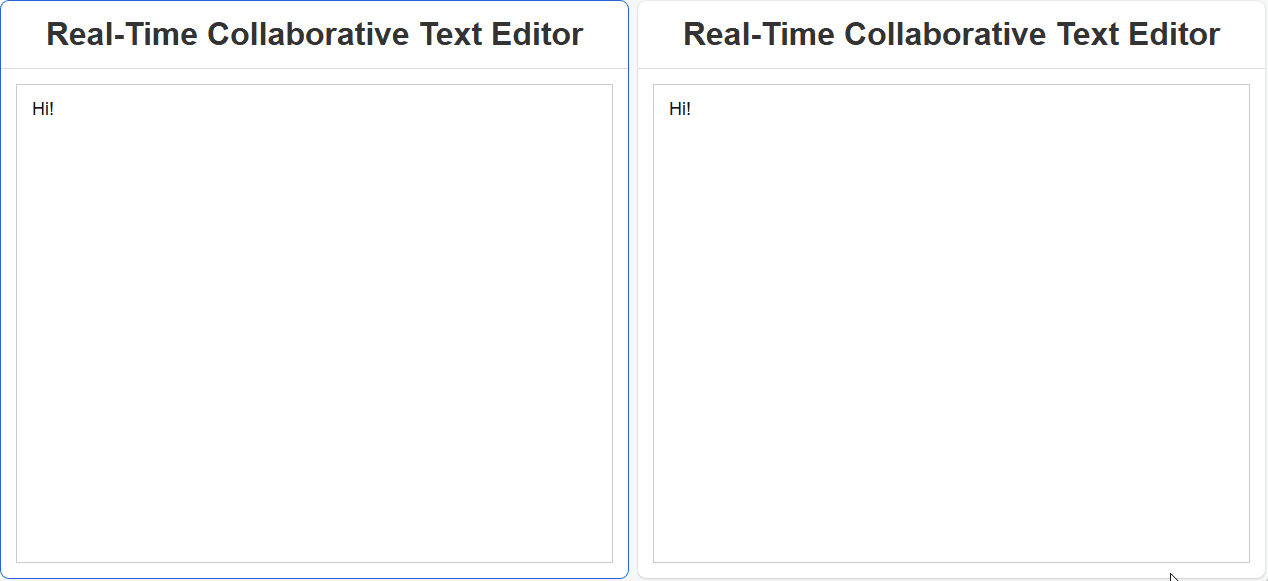
Preview
As illustrated in the figure below, when the user on the left inputs "Hello,world!" into the editor, the user on the right observes the real-time synchronized data.
Step 1: Initialize the Project
Create the Project Folder
Create a new folder named ot-text-editor and navigate into it:
mkdir ot-text-editor
cd ot-text-editor
Initialize a Project of Node.js
Run the following command to create the file
package.json:npm init -yEdit
package.jsonto enable ESM modules and add the following scripts:{ "name": "ot-text-editor", "version": "1.0.0", "type": "module", "scripts": { "start": "node server.js", "build": "webpack" }, "dependencies": {} }Install Dependencies
Install the npm packages required for the server and client:
npm install @mescius/js-collaboration @mescius/js-collaboration-ot express
npm install @mescius/js-collaboration-client @mescius/js-collaboration-ot-client quill
npm install rich-text
Install the npm packages required for the frontend bundling tool:
npm install webpack webpack-cli --save-devCreate the Webpack Configuration File
In the project root directory, create the file
webpack.config.jswith the following content:import path from "path"; import { fileURLToPath } from "url"; const __dirname = path.dirname(fileURLToPath(import.meta.url)); export default { entry: "./public/client.js", output: { path: path.resolve(__dirname, "public"), filename: "client.bundle.js" }, mode: "development" };Create the Basic Directory Structure
Create the file
server.jsin the root directory.In the root directory, create a folder named public. Create empty files within it:
index.html,styles.css, andclient.js.
Now the directory structure should look like this:
/ (project root)
├── public/
│   ├── index.html      # Main page
│   ├── styles.css      # Styles file
│   └── client.js       # Client-side logic
├── server.js           # Server-side logic
├── package.json        # Project configuration
└── webpack.config.js   # Webpack configuration
Step 2: Set Up the Server
Add the following code to the file server.js:
import express from "express";
import { createServer } from "http";
import { Server } from "@mescius/js-collaboration";
import OT from "@mescius/js-collaboration-ot";
import richText from "rich-text";

const app = express();
const httpServer = createServer(app);
const server = new Server({ httpServer });

// Register the rich-text type
OT.TypesManager.register(richText.type);

// Initialize OT document services
server.useFeature(OT.documentFeature());

// Serve static files
app.use(express.static("public"));

// Start the server
httpServer.listen(8080, () => {
  console.log("Server running at http://localhost:8080");
});
Code Explanation
Use OT.TypesManager.register to register the type
rich-text.OT.DocumentServices provides default OT document management functionality.
server.useFeature(OT.documentFeature()) enables OT features.
Step 3: Set Up the Client
The client will use the Quill editor and js-collaboration-ot-client to achieve real-time synchronization.
Write the HTML File (public/index.html)
<!DOCTYPE html>
<html lang="en">
<head>
  <meta charset="UTF-8">
  <title>Real-Time Collaborative Text Editor</title>
  <link href="https://cdn.quilljs.com/1.3.6/quill.bubble.css" rel="stylesheet">
  <link rel="stylesheet" href="./styles.css">
  <script src="./client.bundle.js" defer></script>
</head>
<body>
  <div class="container">
    <h1>Real-Time Collaborative Text Editor</h1>
    <div id="editor"></div>
  </div>
</body>
</html>
Step 3: Set Up the Client
The client will use the Quill editor and js-collaboration-ot-client to achieve real-time synchronization.
Write the HTML File (
public/index.html)<!DOCTYPE html> <html lang="en"> <head> <meta charset="UTF-8"> <title>Real-Time Collaborative Text Editor</title> <link href="https://cdn.quilljs.com/1.3.6/quill.bubble.css" rel="stylesheet"> <link rel="stylesheet" href="./styles.css"> <script src="./client.bundle.js" defer></script> </head> <body> <div class="container"> <h1>Real-Time Collaborative Text Editor</h1> <div id="editor"></div> </div> </body> </html>Write the Styles File (
public/styles.css)html, body { height: 100%; margin: 0; font-family: Arial, sans-serif; background: #f0f2f5; } .container { height: 100vh; display: flex; flex-direction: column; background: #fff; box-shadow: 0 0 10px rgba(0, 0, 0, 0.1); } h1 { padding: 15px; margin: 0; color: #333; text-align: center; border-bottom: 1px solid #ddd; } #editor { flex: 1; border: 1px solid #ccc; margin: 15px; font-size: large; }Write the Client-Side JavaScript (
public/client.js)import { Client } from "@mescius/js-collaboration-client"; import * as OT from "@mescius/js-collaboration-ot-client"; import richText from "rich-text"; import Quill from "quill"; // Register the rich-text type OT.TypesManager.register(richText.type); // Connect to the server and join a room const connection = new Client().connect("room-id"); const doc = new OT.SharedDoc(connection); const quill = new Quill("#editor", { theme: "bubble" }); // Subscribe to the document doc.subscribe().then(async () => { // Initialize content (if the document does not exist) if (!doc.type) { try { await doc.create([{ insert: 'Hi!' }], richText.type.uri); } catch (err) { console.error("Error: " + err); } } // Set initial content and bind events quill.setContents(doc.data); quill.on("text-change", (delta, oldDelta, source) => { if (source !== "user") return; doc.submitOp(delta, { source: connection.id }); }); // Listen for remote operations doc.on("op", (op, source) => { if (source === connection.id) return; // Ignore local operations quill.updateContents(op); }); }); // Error handling connection.on('error', (err) => console.error("Error: " + err)); doc.on("error", (err) => console.error("Error: " + err));Code Explanation
Shared Document: OT.SharedDoc manages the document state and integrates with Quill.
Operation Submission:
quill.on("text-change")captures user edits and submits operations.Synchronization Updates: doc.on("op") receives remote operations and updates the local editor.
Step 4: Run and Test
Bundle the Client Code
npm run buildStart the Server
npm run startYou should see the output:
Server running at http://localhost:8080.Test the Functionality
Open a browser and visit http://127.0.0.1:8080/index.html.
Open the same address in multiple windows, edit the content and observe real-time synchronization.