Cell Styles Dialog
The Cell Styles dialog allows you to visually represent data by applying variations in color, cell borders, alignment, and number formats. It includes both predefined styles and the option to create custom styles for the cells. Whenever you modify the formatting associated with these styles, all the cells which had the style applied will be updated automatically.
Apply Cell Styles
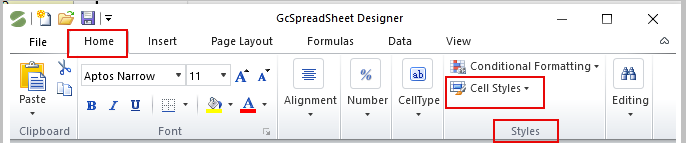
To access Cell Styles dialog, use the Cell Styles option in the Styles group under the Home tab.
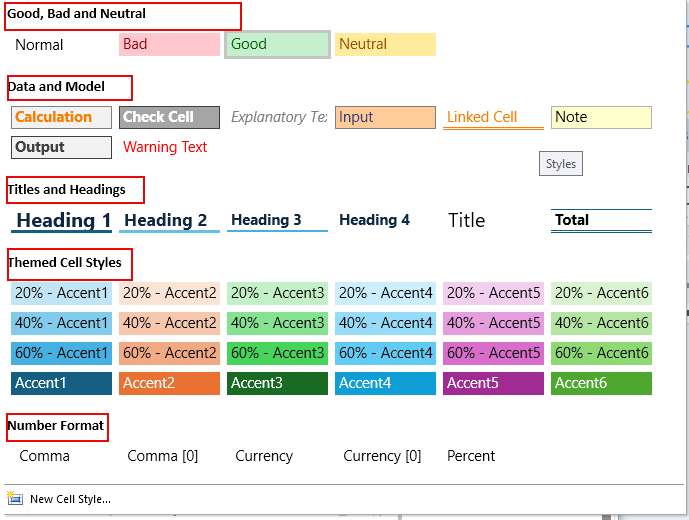
The image below displays the Cell Styles dialog box.
Categories of Pre-defined Cell Styles
Good, Bad and Neutral
The Good, Bad and Neutral section is used to represent respective data types based on how you want it to be interpreted. These styles provide visual cues to highlight positive, negative, and neutral data values, making it easier to identify trends and patterns in your data.
For example, a higher expense figure is usually considered less favorable, but a higher income figure is considered more favorable.
Data and Model
The Data and Model section indicates special types of values, including calculated results, cells where users should input values, cells that display output values, and warning cells.
Titles and Headings
Cell Styles for titles and headings enables you to create a professional and structured layout for your worksheets. Using “Titles and Headings” styles, you can make your headers stand out with bold fonts and colors.
Themed Cell Styles
The Themed Cell Styles section offers varying degrees of color accents that complement the overall theme of the worksheet.
Number Format
In the Number Format section, there are five options for the display style of numbers in the active or selected cells. They are as follows:
Comma - with decimal places
Comma[0]- without decimal places
Currency - with decimal places
Currency[0]- without decimal places
Percent
Creating new styles
If you want to create your own cell style, click New Cell Style… from the Cell Styles dropdown.
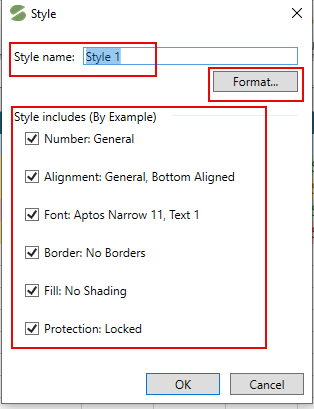
The image below displays how to create a new cell style.

This will open up the Style dialog box, where you can give the style a name, such as Style 1, and choose its elements, such as number format, font, and borders. Click the Format… option to customize its elements.
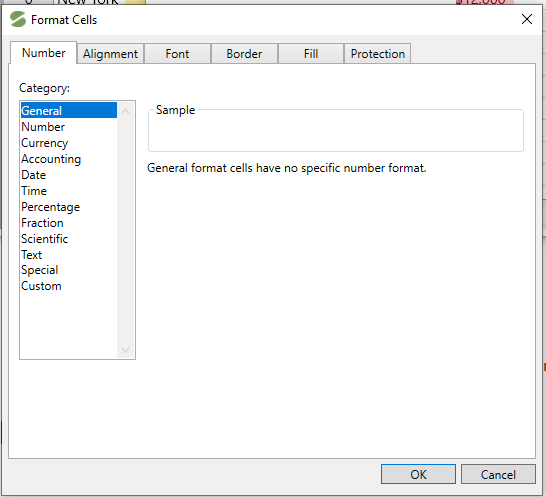
This will open the Format Cells dialog where you can apply and save Number, Alignment, Font, Border, Fill, and Protection settings.
After making the desired changes, click OK and your custom style will be saved to the custom section of the Cell Styles dialog, and can be used anywhere within that workbook.
Note: Custom cell styles are available only in the specific workbook where they were created.
Modify Existing Styles
You can modify both existing built-in cell styles and custom cell styles that you have created.
Follow the below steps to modify the existing cell style:
Go to the Home tab
Select Cell Styles from the Styles group
Right-click on the desired style from the dropdown menu
Choose “Modify…” to access the Style window
The image below displays how to modify the existing cell style:

Ways to Modify
There are two ways to modify an existing cell style:
Duplicate and modify
If you want to modify and duplicate the existing style, follow the steps below:
Duplicate the existing style by right-clicking on the style from the Cell Styles gallery, click Duplicate.
Rename the style in the Style name field
Click the Format button, select the elements to apply style using the Format Cells window, and click OK.
This will be saved as a new custom style in the Custom section of the Cell Styles dropdown menu.
It is important to note that the original style will still exist in its original location when this method is used.
Modify and Overwrite
You can overwrite the format settings on an existing cell style by following steps:
Right click on the style name from the Cell Styles gallery and select Modify.
Click the Format button, change the elements to be modified using the Format Cells window, and click OK.
The original cell style will carry the same name, but will now carry the formatting features you have just created.
Note: Custom-built cell styles can be modified or renamed, while built-in cell styles can be modified but cannot be renamed.
Remove/Delete Existing Styles
To remove/delete a predefined or custom cell style, follow the steps below:
Go to the Home tab and navigate to the Styles group
Click on Cell Styles to open its options
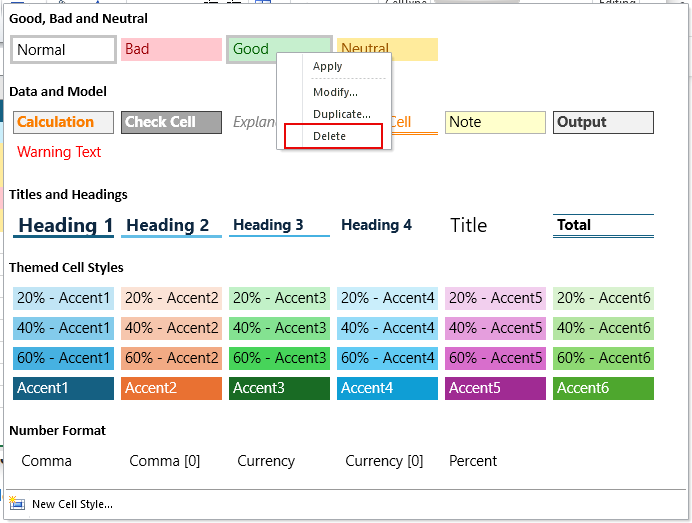
Right-click on the cell style you want to remove and select Delete
The cell style will be instantly deleted from the workbook.
The image below shows the option to delete a style.